Note: This guide only works on systems with X86_64 and UEFI systems. If you are on a PC or laptop made in the last 20 years, odds are it’s X86_64. Unless it’s a chromebook
Arch Linux is an extremely notorious distro, both for its difficulty of use and its unwelcoming community. But it does not need to be so daunting. I believe that Arch is not as difficult as its reputation suggests. I will attempt to make an extremely simple and understandable guide.
Arch Linux, like most operating systems, is distributed in the form of bootable .ISO files. The Arch Linux ISO file is mainly distributed via direct download, as well as a BitTorrent file. I personally recommend the Direct Download for the less tech-savvy, but if you have an unstable or slow connection, or want a faster download; go for the Torrent
To download the Arch Linux ISO via direct download, first, you must go to the ISO mirror list: https://archlinux.org/download/#download-mirrors here, you can find your country in the list, and select the mirror closest to you.
I found my country on the list of countries. Looking at this list, I know that the University of Waterloo is close to me, therefore, I would select the “csclub.uwaterloo.ca” mirror
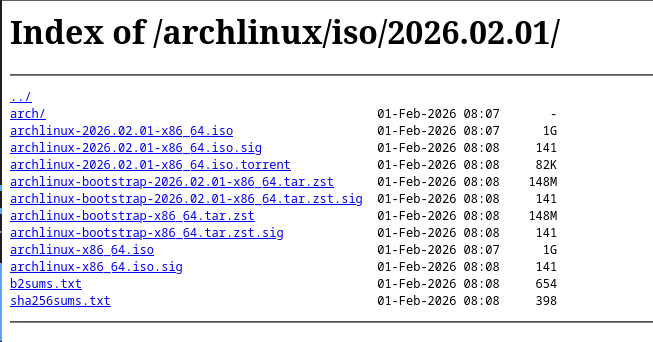
Next, once you found the mirror you would like to use, click the link. You should now see a screen like this: This may look intimidating, but don’t worry! it’s easier than it looks!
From this screen, you are going to want to click both the “archlinux-yyy.mm.dd-X86_64.iso”, as well as the “sha256sums.txt”. sha256sums.txt should open as a tab on your browser rather than downloading. Do not close this as we will need it later! now that you have the .ISO file on your system, you can now skip to the “Checksum” section!
Note: This guide assumes you have an up-to-date version of qBitTorrent installed. You can download it here
Arch Linux provides both a magnet link, as well as a .torrent file. In this guide I will show you how to use the magnet link.
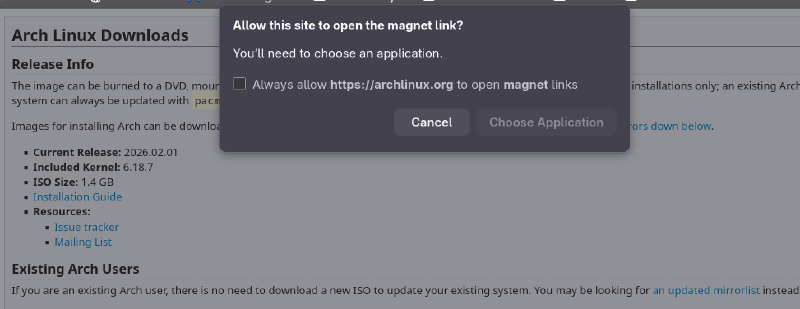
Go to archlinux.org/download/ and click “magnet link” under the “BitTorrent Download” section. Alternatively, you can click here to go straight to the magnet. While you are on archlinux.org/download, scroll down to the section titled “Checksums and signatures”, and click “Sha256sums.txt”, as this is needed for the next step
once you click the link, you should see a box like this:
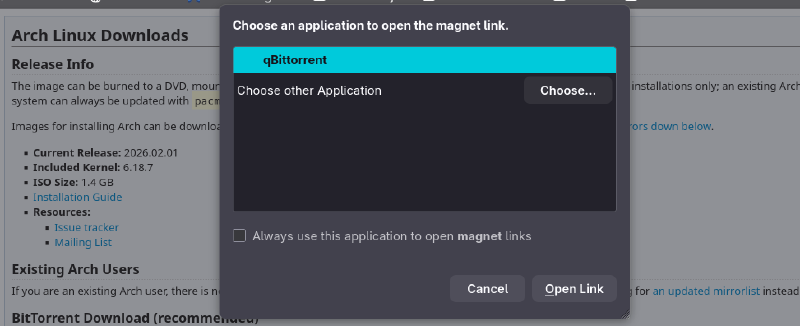
Click “Choose Application”. Then the box should show a list of apps able to open magnet links. If qBitTorrent is your only torrent client, it should already be selected. Now just press “Open Link”
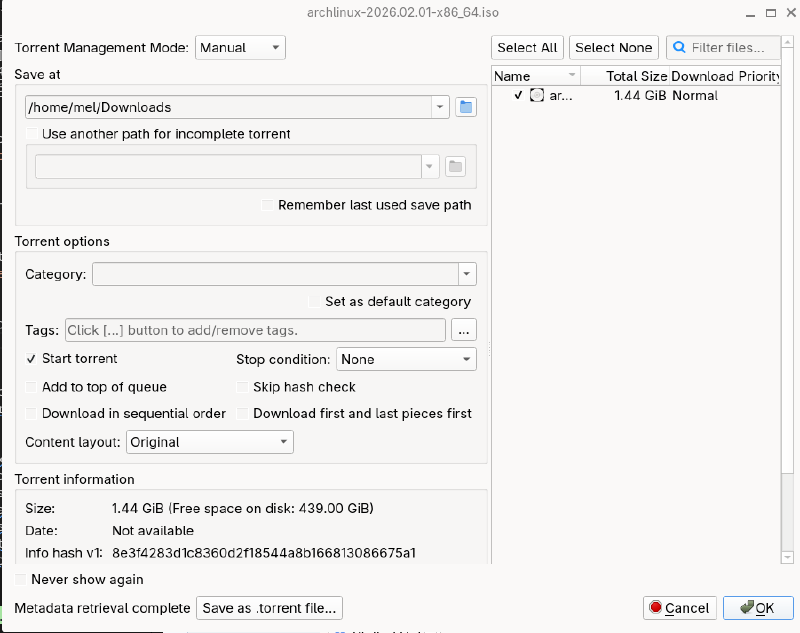
Now, qBitTorrent should Open and you should see a screen like this:
This screen may look busy, but all you need to do is press “OK” in the bottom right corner. You can also use the “Save at” section, to select what folder qBitTorrent puts the Arch ISO.
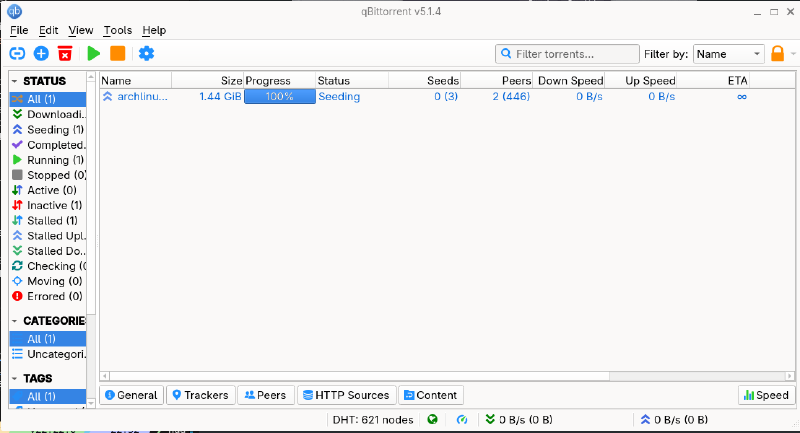
You should now see a screen like this:
except it should show a progress bar, and say the status is “Downloading”. It should be done very quickly, much faster than if you use direct download. You will know it has completed when the status says “Seeding”. When this happens, please keep the torrent seeding for as long as you are able, as the only reason you were able to download this file, was because hundreds of others are seeding the file too. I recommend seeding until you have reached a ratio of at least 1.50.
Note: In this guide I recommend using an online checksum tool. however, this is not best practice, its best to use sha256sum locally
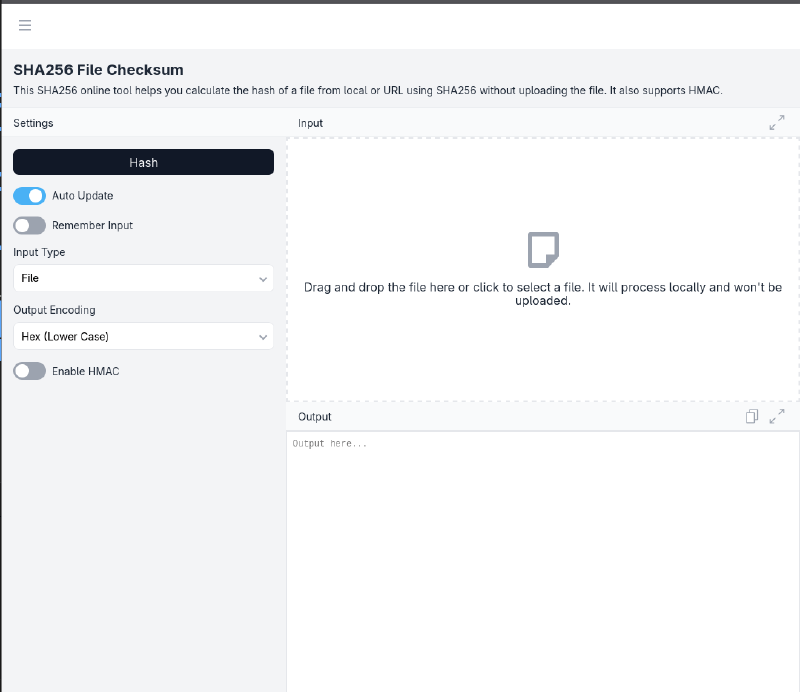
Now that you have the installation file, you need to check it to make sure it’s not corrupted. To do this, we will be using an online checksum tool in order to keep this process simple. Go to emn178.github.io/online-tools/sha256_checksum. Here, you should see a page like this:
Either click the input box, or drag and drop your Linux .ISO file into it, and press “Hash”.
This process should take a few minutes, and at the end, the “Output” box should show a string of characters. In my case, it showed: c0ee0dab0a181c1d6e3d290a81ae9bc41c329ecaa00816ca7d62a685aeb8d972
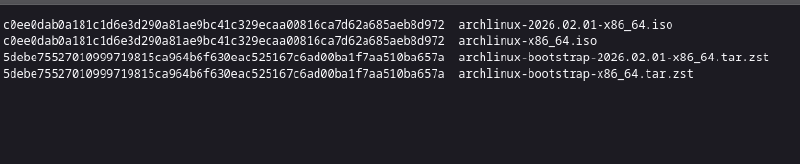
Now that you have your ISO hash, you will need to go back to the “sha256sums.txt” page we opened earlier. Here, you should see a bunch of numbers, next to a bunch of file names, like this:
you are going to want to match the name on the right, with the name of the file on your computer, usually the first one. The string next to it is the hash value we want ours to match, in this case it is c0ee0dab0a181c1d6e3d290a81ae9bc41c329ecaa00816ca7d62a685aeb8d972
We are going to want to make sure this string is Identical to the string we were given from the online tool. I like to use text-compare.com. To quickly compare the two strings.
If the strings are different at all, please delete the file and repeat this process from the beginning!!
Now that we have our .iso file, the next step is to burn it onto a USB drive that we can use to boot our computer. For this, we will be using a software called “Balena Etcher” because it is cross-platform.
Note: Balena Etcher has been accused of sending shady telemetry to their servers. If this is concerning to you, I recommend Rufus
for Windows, and Fedora Media Writer
for Linux
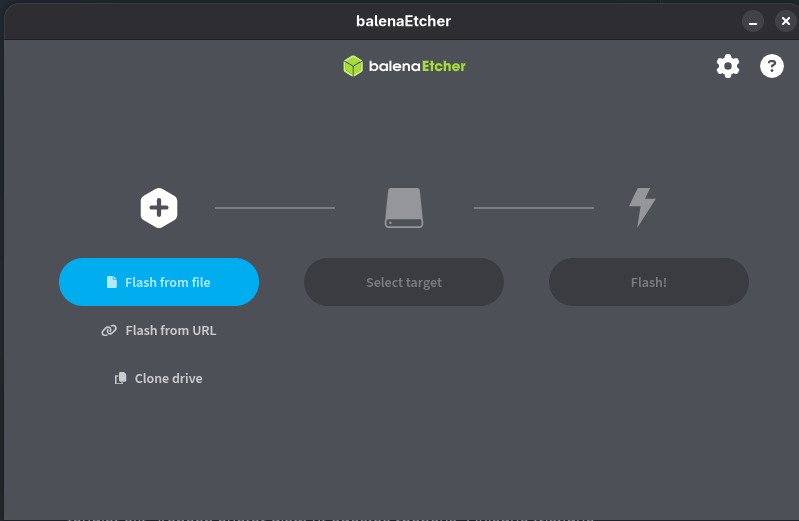
Once you have Balena Etcher installed, you should see a screen like this:
First, click “Flash From file”, and select the .ISO file you just downloaded.
Next, insert your USB flash drive, and press “Select target”, and click your flash drive from the list. Balena Etcher is useful for beginners because by default, it hides system drives from the selection. Regardless, make ABSOLUTELY SURE this is the right drive, as this will wipe everything from it.
Warning! This step is destructive. Please quadruple check the drive you selected is safe to wipe
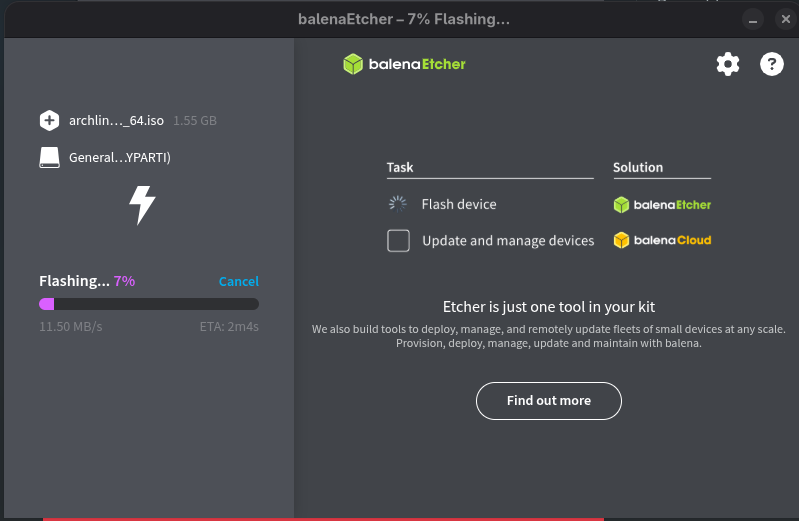
Finally, press “Flash!”. You should now see a screen like this:
this will take some time, so feel free to do other stuff while you wait.
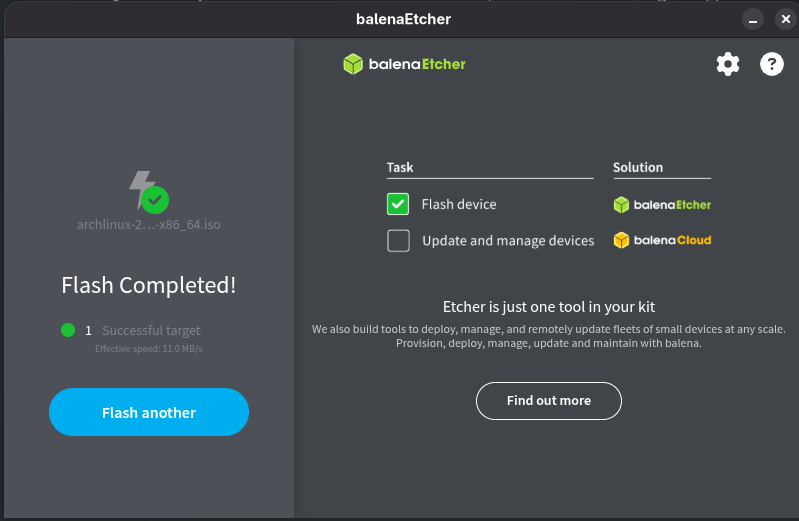
Once you see this:
the drive has successfully been flashed with Arch Linux, and you can safely close the app.
Now that you have the USB flash drive, You are going to plug it into the computer you want to install Arch Linux on, and power it off completely. In order to boot from the USB drive, you need to spam-press a specific keyboard button while the computer is powering up. What button this is depends on the manufacturer of the motherboard. Below is a list of common boot menu keys, courtesy of fixmestick.com
Computer Manufacturer
Type
Model
Boot Menu Key
ACER
Esc, F12, F9
ACER
netbook
AspireOne, Aspire Timeline
F12
ACER
netbook
Aspire v3, v5, v7
F12
APPLE
After 2006
Option
ASUS
desktop
F8
ASUS
laptop
Esc
ASUS
laptop
R503C
F8
ASUS
netbook
Eee PC 1025c
Esc
COMPAQ
Presario
Esc, F9
DELL
desktop
Dimension, Inspiron, Latitude
F12
DELL
desktop
Inspiron One 2020, 2305, 2320, 2330 All-In-One
F12
DELL
laptop
Inspiron
F12
DELL
laptop
Precision
F12
EMACHINES
F12
GATEWAY
F11, Esc, F10
HP
generic
Esc, F9
HP
desktop
Media Center
Esc
HP
desktop
Pavilion 23 All In One
Esc
HP
desktop
Pavilion g6 and g7
Esc
HP
desktop
Pavilion HPE PC, h8-1287c
Esc
HP
desktop
Pavilion PC, p6 2317c
Esc
HP
desktop
Pavilion PC, p7 1297cb
Esc
HP
desktop
TouchSmart 520 PC
Esc
HP
laptop
2000
Esc
HP
notebook
Pavilion
Esc
HP
notebook
ENVY dv6 and dv7 PC
Esc
INTEL
F10
LENOVO
desktop
F12, F8, F10
LENOVO
laptop
F12
LENOVO
laptop
IdeaPad P500
F12 or Fn + F11
NEC
F5
PACKARD BELL
F8
SAMSUNG
F12, Esc
SAMSUNG
netbook
NC10
Esc
SAMSUNG
ultrabook
Series 5 Ultra and Series 7 Chronos
Esc
SHARP
SONY
VAIO, PCG, VGN
F11, ASSIST
SONY
VGN Esc
F10, ASSIST
TOSHIBA
Protege, Satellite, Tecra
F12
TOSHIBA
Equium F12
F12
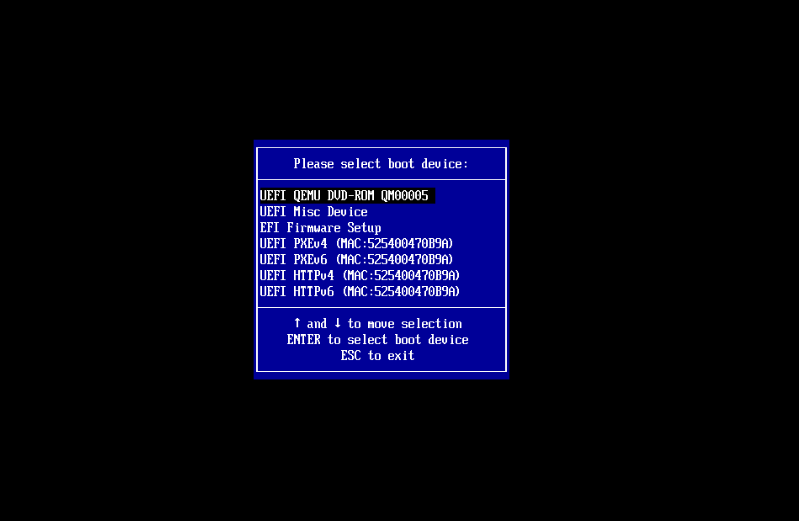
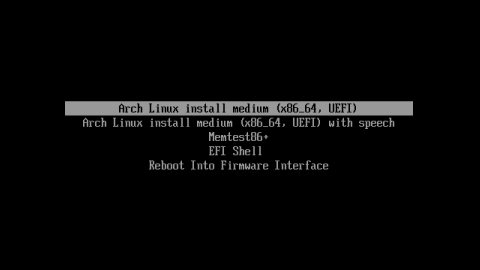
The appearance of the boot menu depends greatly on the model of computer you are using, but generally looks something like this: the entries on yours will look a lot different to mine!
if everything we have done so far has worked, you should see an entry that shares a similar name to the device you selected in Etcher.
Use the arrow keys to move the selector to this entry, and press Enter!
Once you select your drive, you should be put into another menu that looks like this: If you require accessibility features, select the 2nd option
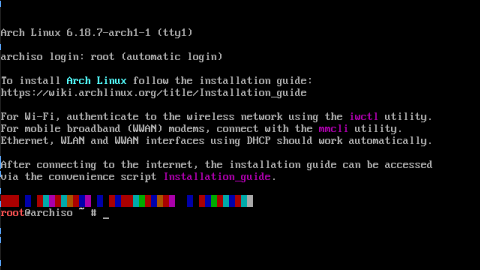
This menu skips after a few seconds, but if it has not, just press enter on the 1st option to enter the install menu. A lot of text will fly by your screen for a few seconds, after that, if everything worked, this should show up:
This is the Arch Linux install screen, and now that we see it, we can move on to the next step.
By default, Arch Linux uses the US keyboard layout, but if you use a different keyboard layout, you are going to want to change that ASAP. To do that, we are going to be using the loadkeys command.
First, to get the list of supported layouts by typing:
localectl list-keymaps
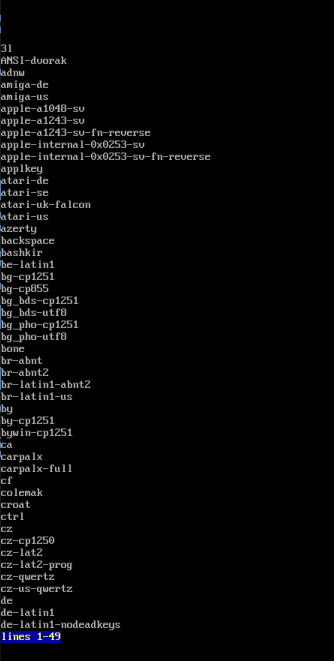
This should bring you to a list of keyboard layouts like this:
Simply use the up and down arrow keys to navigate this list, and look for the keyboard layout you want. Once you have found the name of the layout you use, press “q” to exit the list, and type
loadkeys <LAYOUT NAME>
And replace LAYOUT NAME with the name of the layout you want to use.
To partition our disks, we will be using a tool called “cfdisk”.
Note If you have more than one drive, use lsblk to list all the drives on your device, find the name of the drive you want to install it on, and run cfdisk by typing cfdisk /dev/<DRIVE NAME>
First we must enter cfdisk by simply typing
cfdisk
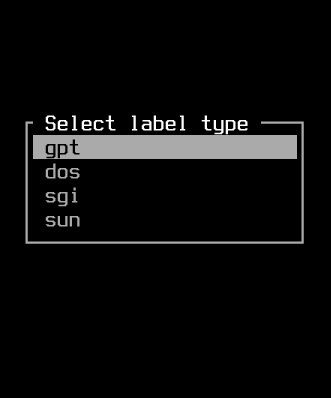
You should be greeted with a screen like this:
Press Enter on the “gpt” option, and you should now see a screen like this:
If you have not wiped your drives yet, you may see many entries on this list. Hover over each one with up and down arrows, and press enter on “delete” at the bottom, selecting it with left and right arrows
Once the only entry on that list is “Free space”; hover over it and press “New”
You should see “Partition size:” at the bottom. Use backspace to delete what is already there. Type:
Note: The following sizes are minimum recommendations. swap should be about half your ram size.
1G
And press enter
you should now see a new entry on the list. Now use the up and down arrow keys to hover over the “Free space” entry again, and once again press “New”.
This time, type:
4G
And press “Enter”.
Once more press new on free space, but this time, just press enter again, leaving the size as default.
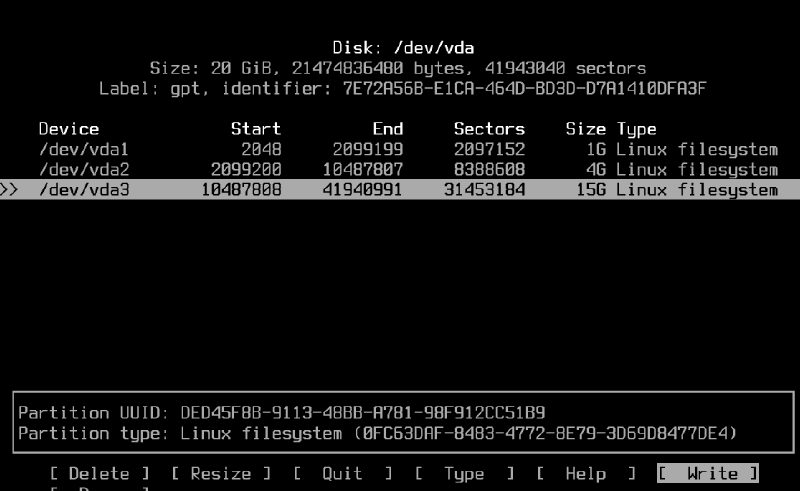
You should see something like this:
Finally. Press “Write”, and type “yes”
Warning! This will delete EVERYTHING off this drive, please make sure you are sure before pressing “Enter”
We are now done with cfdisk, so press “Quit” to close it.
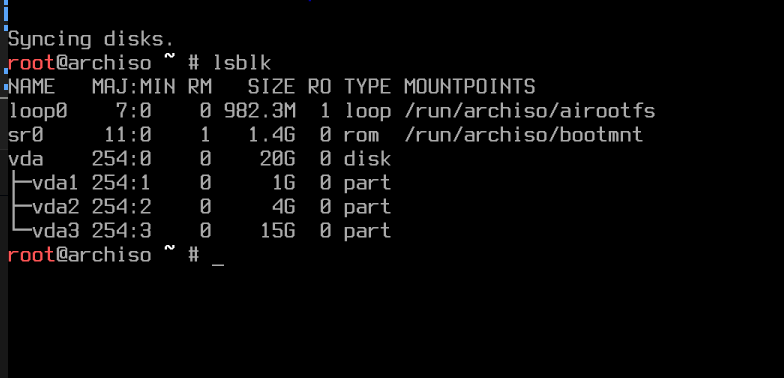
Now run the command:
lsblk
You should see the 3 entries you just made labeled <DISK NAME> 1, 2, and 3 like this:
Now that we have made our partitions, it’s time to partition them. Each partition we made is for a specific purpose.
First, find the largest partition, in my screenshot it would be vda3 but yours will be different. We will use this partition as our root filesystem, where we store everything from downloads to the OS files. To create this filesystem, run:
mkfs.ext4 /dev/<DISK_NAME_3>
Next we will make our Swap partition. This partition acts as virtual ram, allowing your PC to function when the ram is at max capacity. This would be partition 2 in our case, and named vda2 for me. Run the command:
mkswap /dev/<DISK_NAME_2>
Finally, we will make our EFI partition. This partition stores the files and information our computer needs to boot up properly and open up Arch Linux. This will be disk 1 in our case, and vda1 for me. Run the command:
mkfs.fat -F 32 /dev/<DISK_NAME_1>
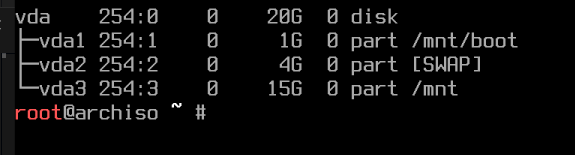
Now that we have made our filesystems, the last thing to do is mount them! run these 3 commands:
mount /dev/<DISK_NAME_3> /mnt

swapon /dev/<DISK_NAME_2>

mount --mkdir /dev/DISK_NAME_1 /mnt/boot
Now that all the disk stuff is out of the way, it’s time to download our programs! this part of the guide is going to be one big command with a bunch of options. I will first go over the base command and the necessities, then I will go over the situational additions
We will be running the command:
pacstrap -K /mnt base linux linux-firmware sof-firmware base-devel grub efibootmgr nano man-db networkmanager <OPTIONAL PACKAGES HERE>
If your computer uses:
An AMD CPU: add “amd-ucode” to the pacstrap
An Intel CPU: add “intel-ucode” to the pacstrap
Multiple Operating Systems: add “os-prober” to the pacstrap
Once you have every package you need added to the pacstrap list, press “Enter” and watch the magic!
Okay, now that we are done with the fun part, time to go back to the boring technical stuff.
First, we need to generate a “Fstab” file. This file tells the system what disks to mount on startup, saving us from needing to re-mount them every time. All you need to do is run:
genfstab -U /mnt >> /mnt/etc/fstab
Now it’s time to enter our new system. To do this, we will run the command:
arch-chroot /mnt
Once you do this, the prompt will change from red to gray, indicating that you are now in the installed system rather than the USB
“Region” is typically the continent you live on, and “City” is the nearest major city. In my case, since I live in southern Ontario, I would put:
ln -sf /usr/share/zoneinfo/America/Toronto /etc/localtime
Next, we need to sync our hardware clock with the command:
hwclock --systohc
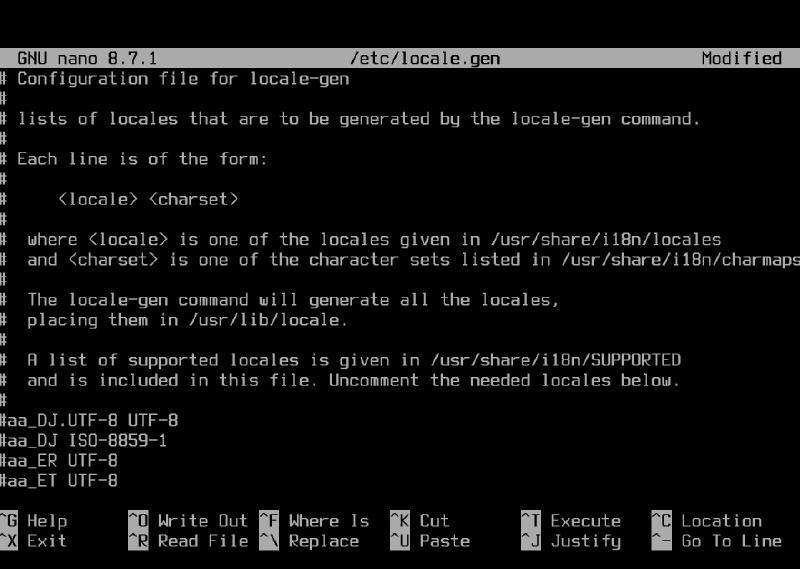
Next we need to set our locale. First, run the command:
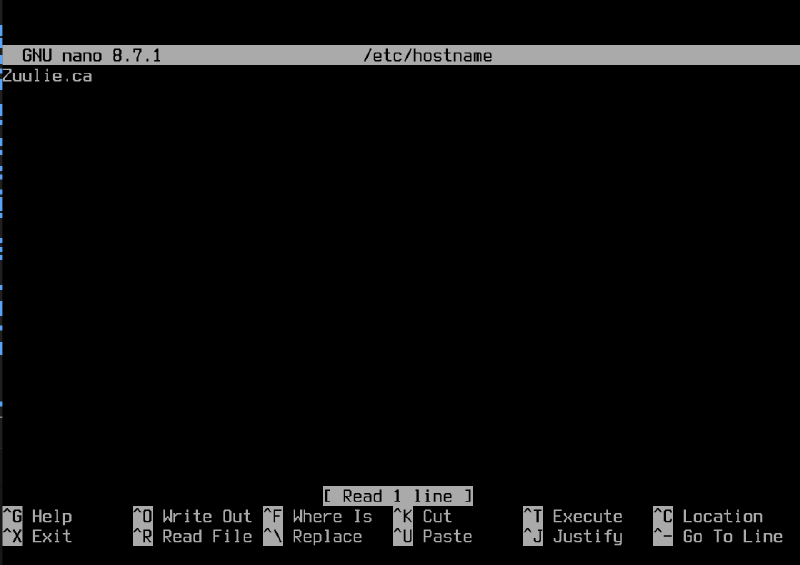
nano /etc/locale.gen
This will open the file locale.gen in “nano” a keyboard based text editor. It should look like this:
.
Use the arrow keys to scroll down until you find your locale. Typically it’s
You need to use the arrow keys and backspace to delete the # before the code, then press Ctrl + X then y then Enter
Now that we have selected our locale in the file, it’s time to run the file to actually set it as our locale. To do this, run:
locale-gen
You should now see the name of the locale you generated in the command prompt, as well as “Generation complete”. If you don’t, double check that the locale is properly uncommented in the file. Please keep a note of exactly what locale you selected, as it is needed for the next step.
Now we need to once again use nano, this time running
nano /etc/locale.conf
In this file, we are going to type:
LANG=<LOCALE>.UTF-8
In my case it would be LANG=en_CA.UTF-8
Once again we are going to press Ctrl + X then y then Enter
Note! this step can be skipped if you are using the US keyboard layout
Finally, we set our keyboard layout. To do this we type:
To be able to do administrator level tasks from your account, such as installing programs, you are going to need to set up “sudo”. Sudo is a prefix you can add to any command to run it as an administrator, similar to Windows “Run as Administrator.”
To get started, run:
EDITOR=nano visudo
This command will open up a big file full of text.
Scroll down until you see this line:
##Uncomment to allow all members of group wheel to execute any command
You are going to scroll to the line directly Below that message, and remove the “#” it should look like this:
Once you have done that, save and close it using “Ctrl + x”.
Now we are done setting up Arch. It’s time to restart our computer!
Type:
exit
Then type;
umount -a
Finally type:
reboot
If all went well, you should see grub for a few seconds, then automatically be put into the Arch console! now that this is done, it’s time for the fun part
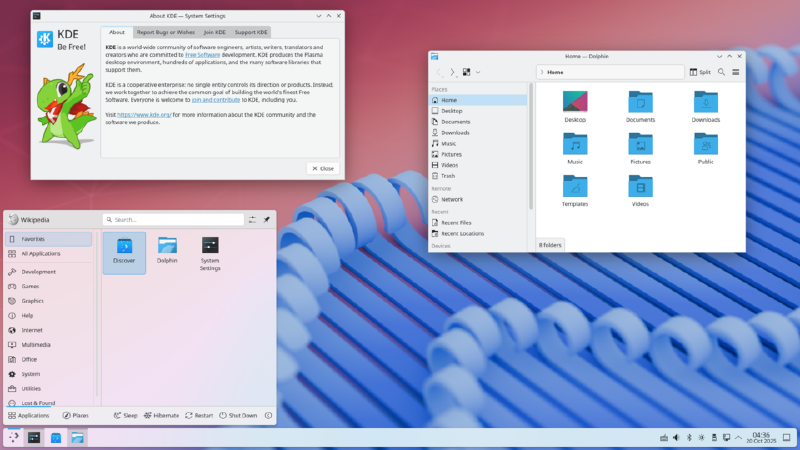
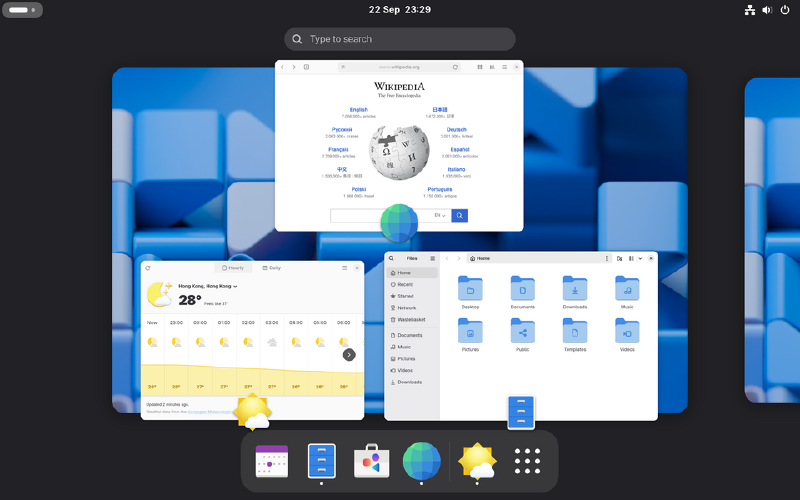
Linux comes with many different desktop systems, each with their own look and feel, as well as entire suites of apps. You can also install a Window Manager such as i3 or Hyprland (my wm of choice), but that is beyond the scope of this guide.
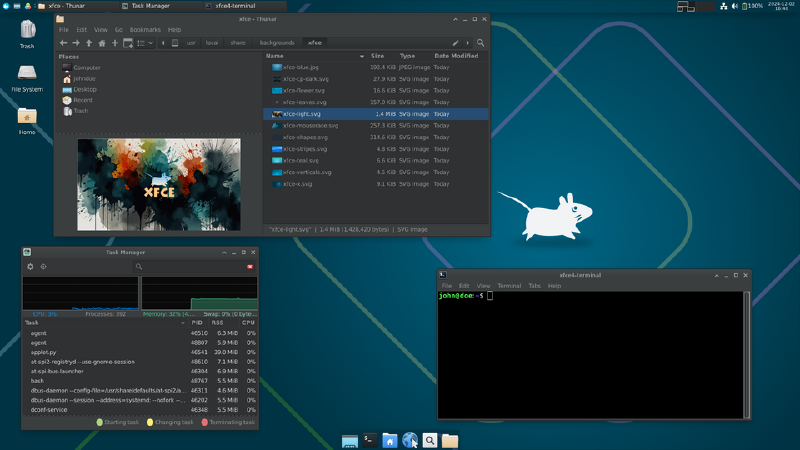
Xfce is a popular choice for low-power machines. It lacks many of the flashy features of other Desktop Environments, but thrives in pure performance and speed
Pick this if you want:
A light Desktop Environment
A smooth experience for a low-power machine
Low ram usage
Smooth and stable experience
To install, run:
sudo pacman -S xfce4 xfce4-goodies firefox sddm
Note: xfce4-goodies is not required to run, but recommended for the full experience